Product SiteDocumentation Site

12.2. الحوسبة الظاهرية

الحوسبة الظاهرية (virtualization) هي إحدى أهم تطورات الحوسبة في السنوات الأخيرة. يغطي المصطلح العديد من المفاهيم والتقنيات المستخدمة لمحاكاة الحواسيب الظاهرية بدرجات متفاوتة من الاستقلال عن العتاد الفعلي. يمكن لمخدم فيزيائي واحد عندها أن يستضيف العديد من الأنظمة التي تعمل في الوقت نفسه بمعزل عن بعضها. تطبيقات هذه التقنية عديدة، وهي مشتقة غالبًا من فكرة العزل: كاختبار بيئات لها إعدادات مختلفة مثلاً، أو فصل الخدمات المقدمة عبر حواسيب ظاهرية (virtual) مختلفة لزيادة الأمن.
هناك الكثير من حلول الحوسبة الظاهرية، لكل منها ميزاته وعيوبه. يركز هذا الكتاب على Xen، و LXC، وKVM، لكن هناك حلول أخرى تستحق الذكر منها:

12.2.1. ‏Xen

Xen هو حل محاكاة ”شبه ظاهرية – paravirtualization“. يقدم Xen طبقة عزل رقيقة، تدعى ”المشرف – hypervisor“، بين العتاد والأنظمة العليا؛ تعمل بمثابة مرجع يتحكم بالوصول للعتاد من الحواسيب الظاهرية. لكنها تعالج عدداً قليلاً من التعليمات، أما البقية فتنفذ مباشرة على العتاد بالنيابة عن الأنظمة الظاهرية. الميزة الأساسية هي أن مستوى الأداء لا ينخفض، والنظم تعمل بسرعات تقترب من السرعة الأصلية؛ لكن نقطة الضعف هي أن نوى نظم التشغيل التي يمكن استخدامها مع مشرف Xen يجب تعديلها لتناسب العمل على Xen.
Let's spend some time on terms. The hypervisor is the lowest layer, which runs directly on the hardware, even below the kernel. This hypervisor can split the rest of the software across several domains, which can be seen as so many virtual machines. One of these domains (the first one that gets started) is known as dom0, and has a special role, since only this domain can control the hypervisor and the execution of other domains. These other domains are known as domU. In other words, and from a user point of view, the dom0 matches the “host” of other virtualization systems, while a domU can be seen as a “guest”.
استخدام Xen في دبيان يحتاج ثلاثة مكونات:
  • The hypervisor itself. According to the available hardware, the appropriate package providing xen-hypervisor will be either xen-hypervisor-4.14-amd64, xen-hypervisor-4.14-armhf, or xen-hypervisor-4.14-arm64.
  • A kernel that runs on that hypervisor. Any kernel more recent than 3.0 will do, including the 5.10 version present in Bullseye.
  • معمارية i386 تحتاج أيضًا لمكتبة قياسية مع الترقيعات المناسبة للاستفادة من Xen؛ هذه متوفرة في الحزمة libc6-xen.
The hypervisor also brings xen-utils-4.14, which contains tools to control the hypervisor from the dom0. This in turn brings the appropriate standard library. During the installation of all that, configuration scripts also create a new entry in the GRUB bootloader menu, so as to start the chosen kernel in a Xen dom0. Note, however, that this entry is not usually set to be the first one in the list, but it will be selected by default.
بعد تثبيت هذه المتطلبات، يأتي دور اختبار سلوك dom0 نفسه؛ هذا يحتاج إعادة الإقلاع إلى المشرف ونواة Xen. يجب أن يقلع النظام بالأسلوب العادي، مع بعض الرسائل الإضافية على الشاشة خلال خطوات التهيئة المبكرة.
الآن حان وقت تثبيت أنظمة مفيدة على نطاقات domU، باستخدام الأدوات من حزمة xen-tools. توفر هذه الحزمة الأمر xen-create-image، الذي يؤتمت معظم المهمة. البارامتر الإجباري الوحيد هو --hostname، لإعطاء اسم للنطاق domU؛ الخيارات الأخرى هامة، لكن يمكن تخزينها في ملف الضبط /etc/xen-tools/xen-tools.conf، وغيابها من سطر الأوامر لا يسبب خطأ. من المهم إذاً التحقق من محتويات هذا الملف قبل إنشاء الصور، أو استخدام بارامترات إضافية عند استدعاء xen-create-image. نذكر من البارامترات الهامة:
  • --memory، لتحديد كمية RAM المخصصة للنظام الجديد؛
  • --size و --swap، لتحديد حجم ”الأقراص الظاهرية“ المتاحة للـ domU؛
  • --debootstrap-cmd, to specify the which debootstrap command is used. The default is debootstrap if debootstrap and cdebootstrap are installed. In that case, the --dist option will also most often be used (with a distribution name such as bullseye).
  • يبين --dhcp أن الحصول على إعدادات الشبكة في domU يتم من خلال DHCP بينما يسمح --ip بتحديد عنوان IP ستاتيكي (ثابت).
  • أخيراً، يجب اختيار طريقة التخزين للصور المنشأة (التي سيراها domU على أنها أقراص صلبة). أبسط طريقة، التي تقابل الخيار --dir، هي إنشاء ملف على dom0 لكل جهاز يجب تقديمه للـ domU. هناك بديل للأنظمة التي تستخدم LVM، وهو استخدام الخيار --lvm، متبوعاً باسم مجموعة حيزات (VG)؛ عندئذ سينشئ xen-create-image حيزاً منطقيًا جديداً داخل تلك المجموعة، وسيكون هذا الحيز الجديد متاحاً للـ domU بشكل قرص صلب.
بعد تحديد هذه الخيارات، يمكننا إنشاء صورة domU:
# xen-create-image --hostname testxen --dhcp --dir /srv/testxen --size=2G --dist=bullseye --role=udev

General Information
--------------------
Hostname       :  testxen
Distribution   :  bullseye
Mirror         :  http://deb.debian.org/debian
Partitions     :  swap            512M  (swap)
                  /               2G    (ext4)
Image type     :  sparse
Memory size    :  256M
Bootloader     :  pygrub

[...]
Logfile produced at:
	 /var/log/xen-tools/testxen.log

Installation Summary
---------------------
Hostname        :  testxen
Distribution    :  bullseye
MAC Address     :  00:16:3E:C2:07:EE
IP Address(es)  :  dynamic
SSH Fingerprint :  SHA256:K+0QjpGzZOacLZ3jX4gBwp0mCESt5ceN5HCJZSKWS1A (DSA)
SSH Fingerprint :  SHA256:9PnovvGRuTw6dUcEVzzPKTITO0+3Ki1Gs7wu4ke+4co (ECDSA)
SSH Fingerprint :  SHA256:X5z84raKBajUkWBQA6MVuanV1OcV2YIeD0NoCLLo90k (ED25519)
SSH Fingerprint :  SHA256:VXu6l4tsrCoRsXOqAwvgt57sMRj2qArEbOzHeydvV34 (RSA)
Root Password   :  FS7CUxsY3xkusv7EkbT9yae
لدينا الآن حاسوب ظاهري، لكنه لا يعمل حاليًا (وبالتالي فهو لا يشغل سوى المساحة على القرص الصلب في dom0). طبعاً يمكننا إنشاء المزيد من الصور، وربما استخدمنا بارامترات أخرى.
Before turning these virtual machines on, we need to define how they'll be accessed. They can of course be considered as isolated machines, only accessed through their system console, but this rarely matches the usage pattern. Most of the time, a domU will be considered as a remote server, and accessed only through a network. However, it would be quite inconvenient to add a network card for each domU; which is why Xen allows creating virtual interfaces that each domain can see and use in a standard way. Note that these cards, even though they're virtual, will only be useful once connected to a network, even a virtual one. Xen has several network models for that:
  • أبسط نموذج هو النموذج الجسري bridge model؛ وفيه تعمل جميع بطاقات eth0 (في أنظمة dom0 وdomU على حد سواء) كما لو كانت موصولة مباشرة مع تحويلة إيثرنت Ethernet switch.
  • بعدها يأتي نموذج التوجيه routing model، حيث يعمل dom0 كموجه (راوتر) ما بين أنظمة domU والشبكة الخارجية (الفيزيائية).
  • أخيراً، نموذج NAT، وفيه يصل dom0 ثانية بين أنظمة domU وباقي عناصر الشبكة، لكن لا يمكن الوصول مباشرة من الخارج إلى أنظمة domU، وتمر البيانات عبر dom0 باستخدام network address translation (ترجمة عنوان الشبكة).
هذه الأنماط الثلاثة تحتاج عدداً من الواجهات ذات المسميات الغريبة، مثل vif*، وveth*، ‏peth* وأيضًا xenbr0. يرتب مشرف Xen هذه الواجهات في التخطيط الذي يعرفه المستخدم، حيث يتم التحكم بأدوات من فضاء المستخدم (user-space tools). سوف نقتصر على شرح النموذج الجسري، بما أن نموذج NAT ونموذج التوجيه يناسبان بعض الحالات الخاصة فقط.
The standard configuration of the Xen packages does not change the system-wide network configuration. However, the xend daemon is configured to integrate virtual network interfaces into any pre-existing network bridge (with xenbr0 taking precedence if several such bridges exist). We must therefore set up a bridge in /etc/network/interfaces (which requires installing the bridge-utils package, which is why the xen-utils package recommends it) to replace the existing eth0 entry (be careful to use the correct network device name):
auto xenbr0
iface xenbr0 inet dhcp
    bridge_ports eth0
    bridge_maxwait 0
After rebooting to make sure the bridge is automatically created, we can now start the domU with the Xen control tools, in particular the xl command. This command allows different manipulations on the domains, including listing them and, starting/stopping them. You might need to increase the default memory by editing the variable memory from configuration file (in this case, /etc/xen/testxen.cfg). Here we have set it to 1024 (megabytes).
# xl list
Name                                        ID   Mem VCPUs	State	Time(s)
Domain-0                                     0  3918     2     r-----      35.1
# xl create /etc/xen/testxen.cfg
Parsing config from /etc/xen/testxen.cfg
# xl list
Name                                        ID   Mem VCPUs	State	Time(s)
Domain-0                                     0  2757     2     r-----      45.2
testxen                                      3  1024     1     r-----       1.3
لاحظ أن النطاق testxen يستهلك ذاكرة حقيقية من الـRAM المتاحة للنطاق dom0، وليست ذاكرة ظاهرية. يجب أخذ الحيطة إذن عند بناء مخدم لاستضافة نسخ Xen، وتزويده بذاكرة فيزيائية مناسبة.
ڤوالا! آلتنا الظاهرية قيد الإقلاع. يمكننا الوصول إليها بإحدى طريقتين. الطريقة المعتادة هي الاتصال بها ”عن بعد“ عبر الشبكة، كما كنا سنتصل بأي حاسب حقيقي؛ هذا يحتاج عادة مخدم DHCP أو بعض إعدادات DNS. الطريقة الأخرى، ولعلها الطريقة الوحيدة إذا كانت إعدادات الشبكة غير صحيحة، هي استخدام طرفية hvc0، باستخدام الأمر xl console:
# xl console testxen
[...]

Debian GNU/Linux 11 testxen hvc0

testxen login: 
بعدها يمكنك بدء جلسة، كما لو كنت تجلس وراء لوحة مفاتيح الحاسب الظاهري. يتم الانفصال عن هذه الطرفية بالمفتاحين Control+]‎.
بعد أن يعمل domU، يمكن استخدامه مثل أي مخدم آخر (بما أنه نظام غنو/لينكس في النهاية). لكن بما أنه حاسب ظاهري فهذه الحالة تسمح ببعض المزايا الإضافية. مثلاً، يمكن إيقاف عمل domU مؤقتاً ثم استكماله، بالأمرين xl pause وxl unpause. لاحظ أن الذاكرة المخصصة للنطاق domU تبقى محجوزة أثناء الإيقاف المؤقت، رغم أنه لا يستهلك أي طاقة حسابية من المعالج. الأمران xl save وxl restore جديران بالاهتمام أيضاً: حفظ domU يحرر الموارد التي كان يستهلكها، بما في ذلك ذاكرة RAM. لا يلاحظ domU عند استعادته (أو استكمال عمله) أي شيء إلا مرور الزمن. إذا كان domU يعمل عند إيقاف تشغيل dom0، فسوف تحفظ سكربتات الحزمة حالة domU آلياً، وتستعيدها عند الإقلاع التالي. هذا يؤدي طبعاً للمتاعب التي تظهر عادة عند إسبات الحاسب المحمول. على سبيل المثال؛ إذا تعلق domU لفترة طويلة، فقد تلغى اتصالاته الشبكية. لاحظ أيضاً أن Xen حتى الآن غير متوافق مع شريحة واسعة من واجهة ACPI لإدارة الطاقة، ما يحول دون إمكانية إسبات النظام المستضيف (dom0).
يمكن إيقاف أو إعادة تشغيل domU إما من داخل domU نفسه (بالأمر shutdown) أو من dom0، بالأمر xl shutdown أو xl reboot.
تحتاج معظم أوامر xl الفرعية إلى متغير واحد أو أكثر، غالباً هي اسم domU. هذه المتغيرات مشروحة بشكل جيد في صفحة التعليمات xl(1)‎.

12.2.2. ‏LXC

بالرغم من أن LXC يستخدم لبناء ”حواسيب ظاهرية“، إلا أن LXC –إذا تحرينا الدقة– ليس نظام محاكاة، بل هو نظام لعزل مجموعات من العمليات عن بعضها مع أنها تعمل على نفس الحاسب المستضيف. يستفيد هذا النظام من مجموعة من التطورات الحديثة في النواة لينكس، التي تعرف باسم مجموعات التحكم—control groups، التي تسمح لعدة زمر مختلفة من العمليات التي تدعى ”المجموعات“ برؤية بعض مظاهر النظام الكلي بشكل مختلف. من أبرز هذه المظاهر هي أرقام تعريف العمليات PIDs، وإعدادات الشبكة، ونقاط الربط في نظام الملفات. لا تستطيع أي مجموعة عمليات معزولة مثل هذه الوصول بأي شكل إلى العمليات الأخرى في النظام، كما يمكن تقييد وصولها إلى نظام الملفات بجزء فرعي محدد. يمكن لها أن تملك واجهة شبكية وجدول توجيه خاصين بها، ويمكن ضبطها حتى ترى مجموعة جزئية فقط من الأجهزة المتاحة المتصلة بالنظام.
These features can be combined to isolate a whole process family starting from the init process, and the resulting set looks very much like a virtual machine. The official name for such a setup is a “container” (hence the LXC moniker: LinuX Containers), but a rather important difference with “real” virtual machines such as provided by Xen or KVM is that there is no second kernel; the container uses the very same kernel as the host system. This has both pros and cons: advantages include excellent performance due to the total lack of overhead, and the fact that the kernel has a global vision of all the processes running on the system, so the scheduling can be more efficient than it would be if two independent kernels were to schedule different task sets. Chief among the inconveniences is the impossibility to run a different kernel in a container (whether a different Linux version or a different operating system altogether).
بما أننا نتعامل مع تقنية عزل وليست محاكاة وحسب، فإن إعداد حاويات LXC أعقد من تشغيل مثبت دبيان على جهاز ظاهري. سوف نشرح بعض المتطلبات الأولية، ثم نتجه إلى إعداد الشبكة؛ وبعدها سوف نتمكن من إنشاء النظام الذي سيعمل ضمن الحاوية.

12.2.2.1. الخطوات الأولية

تحوي الحزمة lxc الأدوات اللازمة لتشغيل LXC، ويجب تثبيتها إذن.
يحتاج LXC أيضاً لنظام مجموعات التحكم control groups للإعداد، وهو نظام ملفات ظاهري يتم ربطه على /sys/fs/cgroup. بما أن دبيان 8 قد انتقلت إلى systemd، الذي يعتمد أيضاً على مجموعات التحكم، فهذا يتم تلقائياً أثناء الإقلاع دون الحاجة لأي عمليات إضافية.

12.2.2.2. إعداد الشبكة

The goal of installing LXC is to set up virtual machines; while we could, of course, keep them isolated from the network, and only communicate with them via the filesystem, most use cases involve giving at least minimal network access to the containers. In the typical case, each container will get a virtual network interface, connected to the real network through a bridge. This virtual interface can be plugged either directly onto the host's physical network interface (in which case the container is directly on the network), or onto another virtual interface defined on the host (and the host can then filter or route traffic). In both cases, the bridge-utils package will be required.
The simple case is just a matter of editing /etc/network/interfaces, moving the configuration for the physical interface (for instance, eth0 or enp1s0) to a bridge interface (usually br0), and configuring the link between them. For instance, if the network interface configuration file initially contains entries such as the following:
auto eth0
iface eth0 inet dhcp
فيجب تعطيلها واستبدالها بالتالي:
auto br0
iface br0 inet dhcp
    bridge-ports eth0
إن نتيجة هذا الإعداد ستشبه ما نحصل عليه لو كانت الحاويات أجهزة تتصل بشبكة المستضيف الفيزيائية نفسها. يدير الإعداد ”الجسري“ حركة إطارات الإيثرنت بين جميع الواجهات المجسَّرة، بما فيها الواجهة الفيزيائية eth0 بالإضافة للواجهات الظاهرية المعرفة في الحاويات.
In cases where this configuration cannot be used (for instance, if no public IP addresses can be assigned to the containers), a virtual tap interface will be created and connected to the bridge. The equivalent network topology then becomes that of a host with a second network card plugged into a separate switch, with the containers also plugged into that switch. The host must then act as a gateway for the containers if they are meant to communicate with the outside world.
هذا الإعداد ”الغني“ يحتاج –بالإضافة إلى حزمة bridge-utils– إلى الحزمة vde2؛ عندئذ يصبح ملف /etc/network/interfaces كما يلي:
# Interface eth0 is unchanged
auto eth0
iface eth0 inet dhcp

# Virtual interface 
auto tap0
iface tap0 inet manual
    vde2-switch -t tap0

# Bridge for containers
auto br0
iface br0 inet static
    bridge-ports tap0
    address 10.0.0.1
    netmask 255.255.255.0
بعدها يمكن إعداد الشبكة إما ستاتيكيًا في الحاويات، أو ديناميكيًا باستخدام مخدم DHCP يعمل على المستضيف. إذا استخدم مخدم DHCP فيجب إعداده لإجابة الطلبات على الواجهة br0.

12.2.2.3. إعداد النظام

Let us now set up the filesystem to be used by the container. Since this “virtual machine” will not run directly on the hardware, some tweaks are required when compared to a standard filesystem, especially as far as the kernel, devices and consoles are concerned. Fortunately, the lxc package includes scripts that mostly automate this configuration. For instance, the following commands (which require the debootstrap and rsync packages) will install a Debian container:
# lxc-create -n testlxc -t debian
debootstrap is /usr/sbin/debootstrap
Checking cache download in /var/cache/lxc/debian/rootfs-stable-amd64 ... 
Downloading debian minimal ...
I: Retrieving Release 
I: Retrieving Release.gpg 
[...]
Download complete.
Copying rootfs to /var/lib/lxc/testlxc/rootfs...
[...]
# 
لاحظ أن إنشاء نظام الملفات يتم أولاً في /var/cache/lxc، ثم ينقل إلى المجلد الوجهة. هذا يسمح بإنشاء حاويات متطابقة أسرع بكثير، نظراً لأنك تحتاج للنسخ فقط لا أكثر.
Note that the Debian template creation script accepts an --arch option to specify the architecture of the system to be installed and a --release option if you want to install something else than the current stable release of Debian. You can also set the MIRROR environment variable to point to a local Debian mirror.
The lxc package further creates a bridge interface lxcbr0, which by default is used by all newly created containers via /etc/lxc/default.conf and the lxc-net service:
lxc.net.0.type = veth
lxc.net.0.link = lxcbr0
lxc.net.0.flags = up
These entries mean, respectively, that a virtual interface will be created in every new container; that it will automatically be brought up when said container is started; and that it will be automatically connected to the lxcbr0 bridge on the host. You will find these settings in the created container's configuration (/var/lib/lxc/testlxc/config), where also the device' MAC address will be specified in lxc.net.0.hwaddr. Should this last entry be missing or disabled, a random MAC address will be generated.
من المدخلات المفيدة أيضًا التي يمكن إضافتها لهذا الملف هي تعيين اسم المستضيف hostname:
lxc.uts.name = testlxc
The newly-created filesystem now contains a minimal Debian system and a network interface.

12.2.2.4. تشغيل الحاوية

Now that our virtual machine image is ready, let's start the container with lxc-start --name=testlxc.
In LXC releases following 2.0.8, root passwords are not set by default. We can set one running lxc-attach -n testlxc passwd if we want. We can login with:
# lxc-console -n testlxc
Connected to tty 1
Type <Ctrl+a q> to exit the console, <Ctrl+a Ctrl+a> to enter Ctrl+a itself

Debian GNU/Linux 11 testlxc tty1

testlxc login: root
Password: 
Linux testlxc 5.10.0-11-amd64 #1 SMP Debian 5.10.92-1 (2022-01-18) x86_64

The programs included with the Debian GNU/Linux system are free software;
the exact distribution terms for each program are described in the
individual files in /usr/share/doc/*/copyright.

Debian GNU/Linux comes with ABSOLUTELY NO WARRANTY, to the extent
permitted by applicable law.
Last login: Wed Mar  9 01:45:21 UTC 2022 on console
root@testlxc:~# ps auxwf
USER         PID %CPU %MEM    VSZ   RSS TTY      STAT START   TIME COMMAND
root           1  0.0  0.2  18964 11464 ?        Ss   01:36   0:00 /sbin/init
root          45  0.0  0.2  31940 10396 ?        Ss   01:37   0:00 /lib/systemd/systemd-journald
root          71  0.0  0.1  99800  5724 ?        Ssl  01:37   0:00 /sbin/dhclient -4 -v -i -pf /run/dhclient.eth0.pid [..]
root          97  0.0  0.1  13276  6980 ?        Ss   01:37   0:00 sshd: /usr/sbin/sshd -D [listener] 0 of 10-100 startups
root         160  0.0  0.0   6276  3928 pts/0    Ss   01:46   0:00 /bin/login -p --
root         169  0.0  0.0   7100  3824 pts/0    S    01:51   0:00  \_ -bash
root         172  0.0  0.0   9672  3348 pts/0    R+   01:51   0:00      \_ ps auxwf
root         164  0.0  0.0   5416  2128 pts/1    Ss+  01:49   0:00 /sbin/agetty -o -p -- \u --noclear [...]
root@testlxc:~# 
نحن الآن داخل الحاوية؛ ووصولنا إلى العمليات مقيد بالعمليات التي بدأت من داخل الحاوية نفسها، كما أن وصولنا إلى نظام الملفات مقيد إلى المجموعة الجزئية المعينة لهذه الحاوية من نظام الملفات الكامل (/var/lib/lxc/testlxc/rootfs). يمكننا الخروج من الطرفية باستخدام Control+a q.
Note that we ran the container as a background process, thanks to lxc-start starting using the --daemon option by default. We can interrupt the container with a command such as lxc-stop --name=testlxc.
تحوي الحزمة lxc سكربت تهيئة يستطيع تشغيل حاوية واحدة أو أكثر آلياً عند إقلاع المستضيف (يعتمد السكربت على أمر lxc-autostart الذي يشغل كل الحاويات التي يكون خيار lxc.start.auto فيها مضبوطاً على القيمة 1). يمكن التحكم بدقة أكبر بترتيب التشغيل من خلال lxc.start.order وlxc.group: افتراضياً، يبدأ السكربت أولاً بتشغيل الحاويات التي تنتمي للمجموعة onboot ثم الحاويات التي لا تنتمي لأي مجموعة. وفي كلا الحالتين، يتحدد الترتيب فيما بين أعضاء المجموعة الواحدة من خلال الخيار lxc.start.order.

12.2.3. المحاكاة في KVM

KVM، التي ترمز إلى Kernel-based Virtual Machine، هي أولاً وأخيراً وحدة من وحدات النواة توفر معظم البنية التحتية التي يمكن أن يستفيد منها برنامج المحاكاة، لكنها ليست محاكيًا. التحكم الفعلي بالمحاكاة يتم من خلال تطبيق مبني على QEMU. لا تقلق إذا كان هذا القسم يذكر أوامر تبدأ ب qemu-*: نحن لا نزال نتحدث عن KVM.
لقد دمجت KVM منذ البداية في النواة لينكس، بخلاف نظم المحاكاة الأخرى. اختر مطوروها استغلال مجموعات تعليمات المعالج المخصصة للمحاكاة (Intel-VT و AMD-V)، ما جعل KVM خفيفة الوزن، وأنيقة وغير شرهة للموارد. الجانب السلبي، طبعاً، هو أن KVM لا تعمل إلا على الحواسيب التي تملك معالجات مناسبة. بالنسبة للحواسيب ذات معمارية x86، يمكنك التأكد أن المعالج مناسب عن طريق البحث عن ”vmx“ أو ”svm“ في أعلام المعالج المذكورة في /proc/cpuinfo.
مع دعم Red Hat النشط لتطوير KVM، فقد أصبحت بشكل أو بآخر المرجع في الحوسبة الظاهرية في لينكس.

12.2.3.1. الخطوات الأولية

Unlike such tools as VirtualBox, KVM itself doesn't include any user-interface for creating and managing virtual machines. The virtual qemu-kvm package only provides an executable able to start a virtual machine, as well as an initialization script that loads the appropriate kernel modules.
Fortunately, Red Hat also provides another set of tools to address that problem, by developing the libvirt library and the associated virtual machine manager tools. libvirt allows managing virtual machines in a uniform way, independently of the virtualization system involved behind the scenes (it currently supports QEMU, KVM, Xen, LXC, OpenVZ, VirtualBox, VMWare, and UML). virt-manager is a graphical interface that uses libvirt to create and manage virtual machines.
We first install the required packages, with apt-get install libvirt-clients libvirt-daemon-system qemu-kvm virtinst virt-manager virt-viewer. libvirt-daemon-system provides the libvirtd daemon, which allows (potentially remote) management of the virtual machines running of the host, and starts the required VMs when the host boots. libvirt-clients provides the virsh command-line tool, which allows controlling the libvirtd-managed machines.
تقدم الحزمة virtinst الأداة virt-install، التي تسمح بإنشاء الحواسيب الظاهرية من سطر الأوامر. أخيراً، يسمح virt-viewer بالوصول إلى الطرفية الرسومية للحاسب الظاهري.

12.2.3.2. إعداد الشبكة

كما في Xen و LXC، أكثر الخيارات شيوعاً عند إعداد الشبكة هو استخدام جسر يجمع الواجهات الشبكية لعدة حواسيب ظاهرية (انظر قسم 12.2.2.2, “إعداد الشبكة”).
أو يمكن، كما هو الإعداد الافتراضي الذي تقدمه KVM، إعطاء الحاسب الظاهري عنوناً داخلياً (ضمن المجال 192.168.122.0/24)، وإعداد NAT حتى يتمكن الجهاز الظاهري من الوصول إلى الشبكة الخارجية.
سنفترض في تتمة هذا القسم أن المستضيف لديه واجهة فيزيائية eth0 وجسر br0، وأن الأولى متصلة مع الأخير.

12.2.3.3. التثبيت باستخدام virt-install

يشبه إنشاء حاسب ظاهري تثبيت النظم العادية كثيراً، عدا أن مواصفات الحواسب الظاهري تُحدَّد في أمر طويل جداً.
عملياً، هذا يعني أننا سنستخدم برنامج تثبيت دبيان، من خلال إقلاع الحاسب الظاهري من سواقة DVD-ROM ظاهرية ترتبط مع صورة DVD دبيان مخزنة على النظام المستضيف. سوف يُصدِّر الجهاز الظاهري طرفيته الرسومية عبر بروتوكول VNC (انظر قسم 9.2.2, “استخدام سطوح المكتب الرسومية البعيدة” للتفاصيل)، ما يسمح لنا بالتحكم بعملية التثبيت.
We first need to tell libvirtd where to store the disk images, unless the default location (/var/lib/libvirt/images/) is fine.
# mkdir /srv/kvm
# virsh pool-create-as srv-kvm dir --target /srv/kvm
Pool srv-kvm created

# 
دعنا نبدأ الآن عملية تثبيت الحاسب الظاهري، وإلقاء نظرة قريبة على أهم خيارات virt-install. هذا الأمر يسجل الجهاز الظاهري وبارامتراته عند libvirtd، ثم يشغله حتى نتابع عملية التثبيت.
# virt-install --connect qemu:///system  1
               --virt-type kvm           2
               --name testkvm            3
               --memory 2048             4
               --disk /srv/kvm/testkvm.qcow,format=qcow2,size=10  5
               --cdrom /srv/isos/debian-11.2.0-amd64-netinst.iso  6
               --network bridge=virbr0   7
               --graphics vnc            8
               --os-type linux           9
               --os-variant debiantesting


Starting install...
Allocating 'testkvm.qcow'

1

يحدد خيار --connect ”المشرف“ المستخدم. شكله هو شكل URL يحوي اسم نظام المحاكاة (xen://‏، qemu://‏، lxc://‏، openvz://‏، vbox://، وهكذا) والحاسب الذي يجب أن يستضيف الجهاز الظاهري (يمكن ترك هذا فارغًا في حالة الاستضافة المحلية). لالإضافة لذلك، في حالة استخدام QEMU/KVM، يستطيع كل مستخدم إدارة الحواسيب الظاهرية ولكن بصلاحيات مقيدة، ويسمح مسار URL بتمييز حواسيب ”النظام“ (/system) من الحواسيب الظاهرية (/session).

2

بما أن طريقة إدارة KVM تطابق طريقة إدارة QEMU، فإن الخيار --virt-type kvm يسمح بتحديد استخدام KVM بالرغم من أن URL يبدو وكأنه QEMU.

3

خيار --name يحدد اسمًا (فريداً) للجهاز الظاهري.

4

The --memory option allows specifying the amount of RAM (in MB) to allocate for the virtual machine.

5

The --disk specifies the location of the image file that is to represent our virtual machine's hard disk; that file is created, unless present, with a size (in GB) specified by the size parameter. The format parameter allows choosing among several ways of storing the image file. The default format (qcow2) allows starting with a small file that only grows when the virtual machine starts actually using space.

6

يستخدم خيار --cdrom للإشارة إلى موقع القرص الضوئي المستخدم للتثبيت. يمكن أن يكون المسار مساراً محلياً لصورة ISO، أو URL يمكن الحصول منه على الملف، أو ملف جهاز يمثل سواقة CD-ROM فيزيائية (مثل /dev/cdrom).

7

يحدد --network طريقة دمج بطاقة الشبكة الظاهرية في إعدادات الشبكة في المستضيف. السلوك الافتراضي (الذي حددنا استخدامه صراحة في مثالنا) هو دمجها في أي جسر شبكي سابق. إذا لم يكن هناك أي جسر من قبل، فلن يستطيع الجهاز الظاهري الوصول إلى الشبكة الفيزيائية إلا من خلال NAT، لذلك يأخذ عنواناً ضمن مجال شبكة فرعية داخلية (192.168.122.0/24).
The default network configuration, which contains the definition for a virbr0 bridge interface, can be edited using virsh net-edit default and started via virsh net-start default if not already done automatically during system start.

8

--graphics vnc states that the graphical console should be made available using VNC. The default behavior for the associated VNC server is to only listen on the local interface; if the VNC client is to be run on a different host, establishing the connection will require setting up an SSH tunnel (see قسم 9.2.1.4, “إنشاء الأنفاق المشفرة باستخدام توجيه المنافذ”). Alternatively, --graphics vnc,listen=0.0.0.0 can be used so that the VNC server is accessible from all interfaces; note that if you do that, you really should design your firewall accordingly.

9

يسمح الخياران --os-type و--os-variant بتحسين بعض متغيرات الجهاز الظاهري، اعتماداً على بعض المزايا المعروفة لنظام التشغيل المذكور هنا.
The full list of OS types can be shown using the osinfo-query os command from the libosinfo-bin package.
عند هذه النقطة، بدأ الجهاز الظاهري يعمل، ونحتاج الاتصال بالطرفية الرسومية لمتابعة عملية التثبيت. إذا تم تنفيذ العملية السابقة من بيئة سطح مكتب رسومية، فيجب أن يبدأ هذا الاتصال آلياً. إذا لم يحدث هذا، أو إذا كنا نعمل عن بعد، يمكن تشغيل 
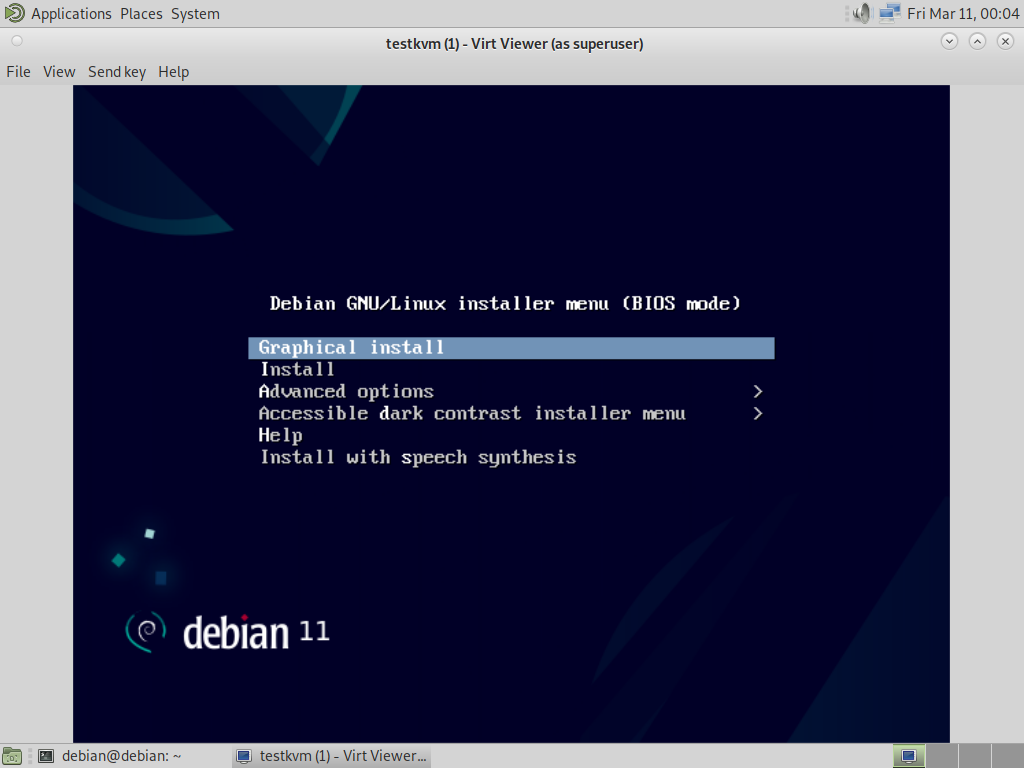
virt-viewer من أي بيئة رسومية لفتح الطرفية الرسومية (لاحظ أن كلمة سر الجذر للنظام البعيد ستطلب مرتين لأن العملية تحتاج لاتصالي SSH):
$ virt-viewer --connect qemu+ssh://root@server/system testkvm
root@server's password: 
Connecting to installer session using virt-viewer

شكل 12.1. Connecting to installer session using virt-viewer

عند انتهاء عملية التثبيت، تتم إعادة تشغيل الجهاز الظاهري، ويصبح جاهزاً عند ذلك للاستخدام.

12.2.3.4. إدارة الأجهزة باستخدام virsh

بعد أن انتهينا من التثبيت، دعنا نرى كيف ندير الأجهزة الظاهرية المتوفرة. أول شيئ سنجربه هو طلب قائمة بالأجهزة التي تديرها libvirtd:
# virsh -c qemu:///system list --all
 Id Name                 State
----------------------------------
  8 testkvm              shut off
دعنا نبدأ تشغيل جهازنا التجريبي:
# virsh -c qemu:///system start testkvm
Domain testkvm started
يمكننا الآن الحصول على تعليمات الاتصال بالطرفية الرسومية (يمكن تمرير لوحة عرض VNC المعادة كمتغير للبرنامج vncviewer):
# virsh -c qemu:///system vncdisplay testkvm
127.0.0.1:0
من أوامر virsh الفرعية المتاحة أيضاً:
  • reboot لإعادة إقلاع الجهاز الظاهري؛
  • shutdown لبدء عملية إيقاف تشغيل نظيفة؛
  • destroy، لإيقاف عمل الجهاز الظاهري قسراً؛
  • suspend لإيقاف عمله مؤقتاً؛
  • resume لاستكمال عمله؛
  • autostart لتفعيل (أو تعطيل، إذا استخدم الخيار --disable) تشغيل الجهاز الظاهري تلقائياً عند إقلاع المستضيف؛
  • undefine لإزالة كافة آثار الجهاز الظاهري من libvirtd.
جميع هذه الأوامر الفرعية تأخذ الاسم المُعِّرف للجهاز الظاهري كمتغير لها.